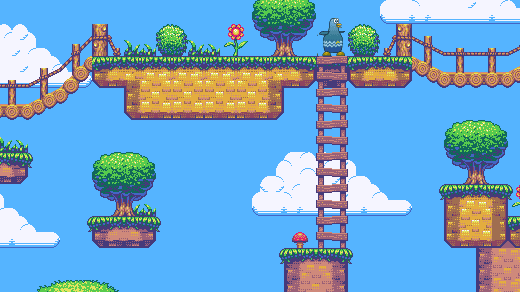
在这个从零构建一个 Python 游戏系列的第六部分中,为你的角色创建一些平台来旅行。
这是仍在进行中的关于使用 Pygame 模块来在 Python 3 中创建电脑游戏的系列文章的第六部分。先前的文章是:
一个平台类游戏需要平台。
在 Pygame 中,平台本身也是个妖精,正像你那个可玩的妖精。这一点是重要的,因为有个是对象的平台,可以使你的玩家妖精更容易与之互动。
创建平台有两个主要步骤。首先,你必须给该对象编写代码,然后,你必须映射出你希望该对象出现的位置。
编码平台对象 要构建一个平台对象,你要创建一个名为 Platform 的类。它是一个妖精,正像你的 Player 妖精 一样,带有很多相同的属性。
你的 Platform 类需要知道很多平台类型的信息,它应该出现在游戏世界的哪里、它应该包含的什么图片等等。这其中很多信息可能还尚不存在,这要看你为你的游戏计划了多少,但是没有关系。正如直到移动你的游戏角色 那篇文章结束时,你都没有告诉你的玩家妖精移动速度有多快,你不必事先告诉 Platform 每一件事。
在这系列中你所写的脚本的开头附近,创建一个新的类。在这个代码示例中前三行是用于说明上下文,因此在注释的下面添加代码:
1
2
3
4
5
6
7
8
9
10
11
12
13
14
15
import pygameimport sysimport os## 新代码如下: class Platform (pygame .sprite .Sprite ):# x location, y location, img width, img height, img file def __init__(self ,xloc ,yloc ,imgw ,imgh ,img ): pygame.sprite.Sprite .__init__(self ) self.image = pygame.image.load(os .path .join ('images' ,img )).convert() self.image.convert_alpha() self.image.set_colorkey(ALPHA ) self.rect = self.image.get_rect() self.rect.y = yloc self.rect.x = xloc
当被调用时,这个类在某个 X 和 Y 位置上创建一个屏上对象,具有某种宽度和高度,并使用某种图像作为纹理。这与如何在屏上绘制出玩家或敌人非常类似。
平台的类型 下一步是绘制出你的平台需要出现的地方。
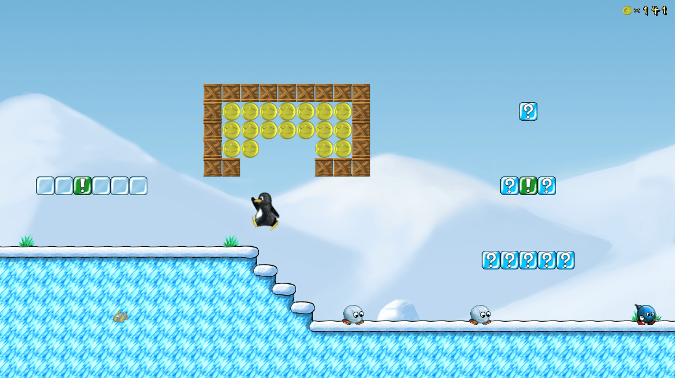
瓷砖方式 实现平台类游戏世界有几种不同的方法。在最初的横向滚轴游戏中,例如,马里奥超级兄弟和刺猬索尼克,这个技巧是使用“瓷砖”方式,也就是说有几个代表地面和各种平台的块,并且这些块被重复使用来制作一个关卡。你只能有 8 或 12 种不同的块,你可以将它们排列在屏幕上来创建地面、浮动的平台,以及你游戏中需要的一切其它的事物。有人发现这是制作游戏最容易的方法了,因为你只需要制作(或下载)一小组关卡素材就能创建很多不同的关卡。然而,这里的代码需要一点数学知识。
SuperTux ,一个基于瓷砖的电脑游戏。
手工绘制方式 另一种方法是将每个素材作为一个整体图像。如果你喜欢为游戏世界创建素材,那你会在用图形应用程序构建游戏世界的每个部分上花费很多时间。这种方法不需要太多的数学知识,因为所有的平台都是整体的、完整的对象,你只需要告诉 Python 将它们放在屏幕上的什么位置。
每种方法都有优势和劣势,并且根据于你选择使用的方式,代码稍有不同。我将覆盖这两方面,所以你可以在你的工程中使用一种或另一种,甚至两者的混合。
关卡绘制 总的来说,绘制你的游戏世界是关卡设计和游戏编程中的一个重要的部分。这需要数学知识,但是没有什么太难的,而且 Python 擅长数学,它会有所帮助。
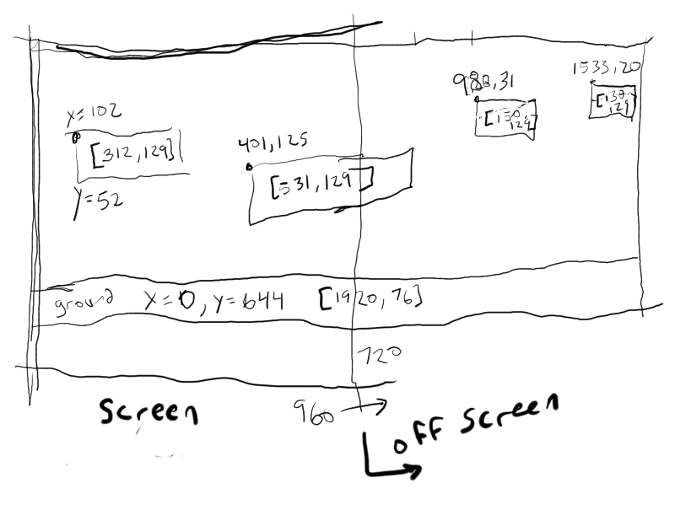
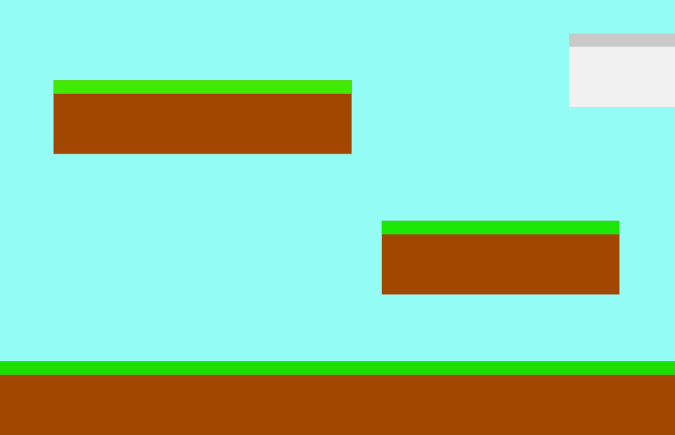
你也许发现先在纸张上设计是有用的。拿一张表格纸,并绘制一个方框来代表你的游戏窗体。在方框中绘制平台,并标记其每一个平台的 X 和 Y 坐标,以及它的宽度和高度。在方框中的实际位置没有必要是精确的,你只要保持数字合理即可。譬如,假设你的屏幕是 720 像素宽,那么你不能在一个屏幕上放 8 块 100 像素的平台。
当然,不是你游戏中的所有平台都必须容纳在一个屏幕大小的方框里,因为你的游戏将随着你的玩家行走而滚动。所以,可以继续绘制你的游戏世界到第一屏幕的右侧,直到关卡结束。
如果你更喜欢精确一点,你可以使用方格纸。当设计一个瓷砖类的游戏时,这是特别有用的,因为每个方格可以代表一个瓷砖。
一个关卡地图示例。
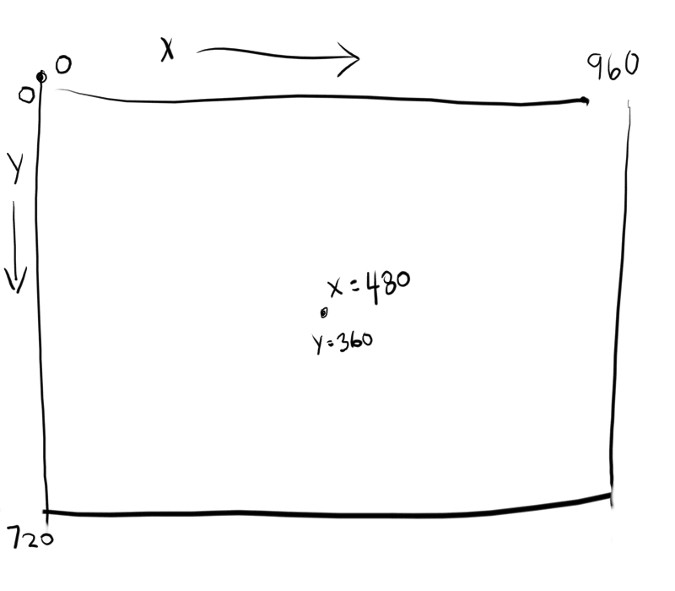
坐标系 你可能已经在学校中学习过笛卡尔坐标系 。你学习的东西也适用于 Pygame,除了在 Pygame 中你的游戏世界的坐标系的原点 0,0 是放置在你的屏幕的左上角而不是在中间,是你在地理课上用过的坐标是在中间的。
在 Pygame 中的坐标示例。
X 轴起始于最左边的 0,向右无限增加。Y 轴起始于屏幕顶部的 0,向下延伸。
图片大小 如果你不知道你的玩家、敌人、平台是多大的,绘制出一个游戏世界是毫无意义的。你可以在图形程序中找到你的平台或瓷砖的尺寸。例如在 Krita 中,单击“图像”菜单,并选择“属性”。你可以在“属性”窗口的最顶部处找到它的尺寸。
另外,你也可以创建一个简单的 Python 脚本来告诉你的一个图像的尺寸。打开一个新的文本文件,并输入这些代码到其中:
1
2
3
4
5
6
7
8
9
10
11
12
13
14
15
16
17
#!/usr/bin/env python3.path if len (sys.argv) > 1 :print (sys.argv [1] )else :.exit ('Syntax: identify.py [filename]' ).argv [1] .open (index_img).size [0] .size [1] print (X,Y)
保存该文本文件为 identify.py。
要使用这个脚本,你必须安装一些额外的 Python 模块,它们包含了这个脚本中新使用的关键字:
一旦安装好,在你游戏工程目录中运行这个脚本:
1
2
$ python3 ./identify.py images/ground.png
在这个示例中,地面平台的图形的大小是 1080 像素宽和 97 像素高。
平台块 如果你选择单独地绘制每个素材,你必须创建想要插入到你的游戏世界中的几个平台和其它元素,每个素材都放在它自己的文件中。换句话说,你应该让每个素材都有一个文件,像这样:
每个对象一个图形文件。
你可以按照你希望的次数重复使用每个平台,只要确保每个文件仅包含一个平台。你不能使用一个文件包含全部素材,像这样:
你的关卡不能是一个图形文件。
当你完成时,你可能希望你的游戏看起来像这样,但是如果你在一个大文件中创建你的关卡,你就没有方法从背景中区分出一个平台,因此,要么把对象绘制在它们自己的文件中,要么从一个更大的文件中裁剪出它们,并保存为单独的副本。
注意: 如同你的其它素材,你可以使用 GIMP 、Krita、MyPaint ,或 Inkscape 来创建你的游戏素材。
平台出现在每个关卡开始的屏幕上,因此你必须在你的 Level 类中添加一个 platform 函数。在这里特例是地面平台,它重要到应该拥有它自己的一个组。通过把地面看作一组特殊类型的平台,你可以选择它是否滚动,或它上面是否可以站立,而其它平台可以漂浮在它上面。这取决于你。
添加这两个函数到你的 Level 类:
1
2
3
4
5
6
7
8
9
10
11
12
13
14
15
16
17
18
19
20
21
22
def ground(lvl,x ,y ,w,h):Group ()1 :Platform (x,y,w,h,'block-ground.png' )add (ground)2 :print ("Level " + str (lvl) )platform ( lvl ):Group ()1 :Platform (200 , worldy-97 -128 , 285 ,67 ,'block-big.png' )add (plat)Platform (500 , worldy-97 -320 , 197 ,54 ,'block-small.png' )add (plat)2 :print ("Level " + str (lvl) )
ground 函数需要一个 X 和 Y 位置,以便 Pygame 知道在哪里放置地面平台。它也需要知道平台的宽度和高度,这样 Pygame 知道地面延伸到每个方向有多远。该函数使用你的 Platform 类来生成一个屏上对象,然后将这个对象添加到 ground_list 组。
platform 函数本质上是相同的,除了其有更多的平台。在这个示例中,仅有两个平台,但是你可以想有多少就有多少。在进入一个平台后,在列出另一个前你必须添加它到 plat_list 中。如果你不添加平台到组中,那么它将不出现在你的游戏中。
提示: 很难想象你的游戏世界的 0 是在顶部,因为在真实世界中发生的情况是相反的;当估计你有多高时,你不会从上往下测量你自己,而是从脚到头顶来测量。
如果对你来说从“地面”上来构建你的游戏世界更容易,将 Y 轴值表示为负数可能有帮助。例如,你知道你的游戏世界的底部是 worldy 的值。因此 worldy 减去地面的高度(在这个示例中是 97)是你的玩家正常站立的位置。如果你的角色是 64 像素高,那么地面减去 128 正好是你的玩家的两倍高。事实上,一个放置在 128 像素处平台大约是相对于你的玩家的两层楼高度。一个平台在 -320 处比三层楼更高。等等。
正像你现在可能所知的,如果你不使用它们,你的类和函数是没有价值的。添加这些代码到你的设置部分(第一行只是上下文,所以添加最后两行):
1
2
3
enemy_list = Level.bad( 1 , eloc )ground_list = Level.ground( 1 ,0 ,worldy-97 ,1080 ,97 )plat_list = Level.platform( 1 )
并把这些行加到你的主循环(再一次,第一行仅用于上下文):
1 2 3 enemy_list.draw( world) # 刷新敌人 ( world) # 刷新地面 ( world) # 刷新平台
瓷砖平台 瓷砖类游戏世界更容易制作,因为你只需要在前面绘制一些块,就能在游戏中一再使用它们创建每个平台。在像 OpenGameArt.org 这样的网站上甚至有一套瓷砖供你来使用。
Platform 类与在前面部分中的类是相同的。
ground 和 platform 在 Level 类中,然而,必须使用循环来计算使用多少块来创建每个平台。
如果你打算在你的游戏世界中有一个坚固的地面,这种地面是很简单的。你只需要从整个窗口的一边到另一边“克隆”你的地面瓷砖。例如,你可以创建一个 X 和 Y 值的列表来规定每个瓷砖应该放置的位置,然后使用一个循环来获取每个值并绘制每一个瓷砖。这仅是一个示例,所以不要添加这到你的代码:
1
2
# Do not add this to your code0,656,64 ,656,128 ,656,192 ,656,256 ,656,320 ,656,384 ,656 ]
不过,如果你仔细看,你可以看到所有的 Y 值是相同的,X 值以 64 的增量不断地增加 —— 这就是瓷砖的大小。这种重复是精确地,是计算机擅长的,因此你可以使用一点数学逻辑来让计算机为你做所有的计算:
添加这些到你的脚本的设置部分:
1
2
3
4
5
6
7
8
9
10
gloc = [] tx = 64 ty = 64 i =0 while i <= (worldx/tx)+tx:gloc .append(i*tx)i =i+1 ground_list = Level.ground( 1 ,gloc,tx,ty )
现在,不管你的窗口的大小,Python 会通过瓷砖的宽度分割游戏世界的宽度,并创建一个数组列表列出每个 X 值。这里不计算 Y 值,因为在平的地面上这个从不会变化。
为了在一个函数中使用数组,使用一个 while 循环,查看每个条目并在适当的位置添加一个地面瓷砖:
1
2
3
4
5
6
7
8
9
10
11
12
13
def ground(lvl,gloc,tx,ty):i =0if lvl == 1:while i < len(gloc):'tile-ground.png' )add (ground)i =i+1if lvl == 2:print ("Level " + str(lvl) )
除了 while 循环,这几乎与在上面一部分中提供的瓷砖类平台的 ground 函数的代码相同。
对于移动的平台,原理是相似的,但是这里有一些技巧可以使它简单。
你可以通过它的起始像素(它的 X 值)、距地面的高度(它的 Y 值)、绘制多少瓷砖来定义一个平台,而不是通过像素绘制每个平台。这样,你不必操心每个平台的宽度和高度。
这个技巧的逻辑有一点复杂,因此请仔细复制这些代码。有一个 while 循环嵌套在另一个 while 循环的内部,因为这个函数必须考虑每个数组项的三个值来成功地建造一个完整的平台。在这个示例中,这里仅有三个平台以 ploc.append 语句定义,但是你的游戏可能需要更多,因此你需要多少就定义多少。当然,有一些不会出现,因为它们远在屏幕外,但是一旦当你进行滚动时,它们将呈现在眼前。
1
2
3
4
5
6
7
8
9
10
11
12
13
14
15
16
17
18
19
20
21
def platform(lvl,tx,ty):plat_list = pygame.sprite.Group()ploc = [] i =0 if lvl == 1 :ploc .append((200 ,worldy-ty-128 ,3 ))ploc .append((300 ,worldy-ty-256 ,3 ))ploc .append((500 ,worldy-ty-128 ,4 ))while i < len(ploc):j =0 while j <= ploc[i][2 ]:plat = Platform((ploc[i][0 ]+(j*tx)),ploc[i][1 ],tx,ty,'tile.png')plat_list .add(plat)j =j+1 print ('run' + str(i) + str(ploc[i]))i =i+1 if lvl == 2 :print ("Level " + str(lvl) )return plat_list
要让这些平台出现在你的游戏世界,它们必须出现在你的主循环中。如果你还没有这样做,添加这些行到你的主循环(再一次,第一行仅被用于上下文)中:
1 2 3 enemy_list.draw( world) # 刷新敌人 ( world) # 刷新地面 ( world) # 刷新平台
启动你的游戏,根据需要调整你的平台的放置位置。如果你看不见屏幕外产生的平台,不要担心;你不久后就可以修复它。
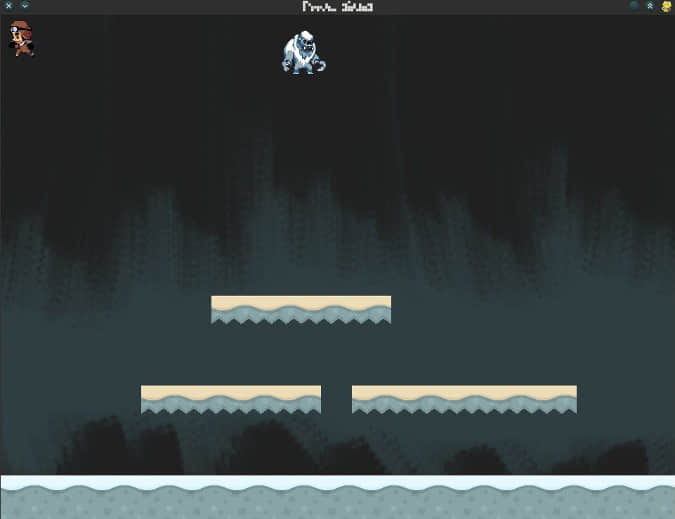
到目前为止,这是游戏的图片和代码:
到目前为止,我们的 Pygame 平台。
1 2 3 4 5 6 7 8 9 10 11 12 13 14 15 16 17 18 19 20 21 22 23 24 25 26 27 28 29 30 31 32 33 34 35 36 37 38 39 40 41 42 43 44 45 46 47 48 49 50 51 52 53 54 55 56 57 58 59 60 61 62 63 64 65 66 67 68 69 70 71 72 73 74 75 76 77 78 79 80 81 82 83 84 85 86 87 88 89 90 91 92 93 94 95 96 97 98 99 100 101 102 103 104 105 106 107 108 109 110 111 112 113 114 115 116 117 118 119 120 121 122 123 124 125 126 127 128 129 130 131 132 133 134 135 136 137 138 139 140 141 142 143 144 145 146 147 148 149 150 151 152 153 154 155 156 157 158 159 160 161 162 163 164 165 166 167 168 169 170 171 172 173 174 175 176 177 178 179 180 181 182 183 184 185 186 187 188 189 190 191 192 193 194 195 196 197 198 199 200 201 202 203 204 205 206 207 208 209 210 211 212 213 214 215 216 217 218 219 220 221 222 223 224 225 226 227 228 229 230 231 232 import pygameimport sysimport os''' Objects ''' class Platform (pygame.sprite.Sprite):def __init__ (self,xloc,yloc,imgw,imgh,img ):self )self .image = pygame.image.load(os.path.join('images' ,img)).convert()self .image.convert_alpha()self .rect = self .image.get_rect()self .rect.y = ylocself .rect.x = xlocclass Player (pygame.sprite.Sprite):''' Spawn a player ''' def __init__ (self ):self )self .movex = 0 self .movey = 0 self .frame = 0 self .health = 10 self .score = 1 self .images = []for i in range (1 ,9 ):'images' ,'hero' + str (i) + '.png' )).convert()self .images.append(img)self .image = self .images[0 ]self .rect = self .image.get_rect()def control (self,x,y ):''' control player movement ''' self .movex += xself .movey += ydef update (self ):''' Update sprite position ''' self .rect.x = self .rect.x + self .movexself .rect.y = self .rect.y + self .moveyif self .movex < 0 :self .frame += 1 if self .frame > ani*3 :self .frame = 0 self .image = self .images[self .frame//ani]if self .movex > 0 :self .frame += 1 if self .frame > ani*3 :self .frame = 0 self .image = self .images[(self .frame//ani)+4 ]self , enemy_list, False )for enemy in enemy_hit_list:self .health -= 1 print (self .health)self , ground_list, False )for g in ground_hit_list:self .health -= 1 print (self .health)class Enemy (pygame.sprite.Sprite):''' Spawn an enemy ''' def __init__ (self,x,y,img ):self )self .image = pygame.image.load(os.path.join('images' ,img))self .rect = self .image.get_rect()self .rect.x = xself .rect.y = yself .counter = 0 def move (self ):''' enemy movement ''' 80 8 if self .counter >= 0 and self .counter <= distance:self .rect.x += speedelif self .counter >= distance and self .counter <= distance*2 :self .rect.x -= speedelse :self .counter = 0 self .counter += 1 class Level ():def bad (lvl,eloc ):if lvl == 1 :0 ],eloc[1 ],'yeti.png' ) if lvl == 2 :print ("Level " + str (lvl) )return enemy_listdef loot (lvl,lloc ):print (lvl)def ground (lvl,gloc,tx,ty ):0 if lvl == 1 :while i < len (gloc):print ("blockgen:" + str (i))'ground.png' )1 if lvl == 2 :print ("Level " + str (lvl) )return ground_list''' Setup ''' 960 720 40 4 True 25 ,25 ,200 )23 ,23 ,23 )254 ,254 ,254 )0 ,255 ,0 )'images' ,'stage.png' )).convert()0 0 10 200 ,20 ]64 64 0 while i <= (worldx/tx)+tx:1 print ("block: " + str (i))1 , eloc )1 ,gloc,tx,ty )''' Main loop ''' while main == True :for event in pygame.event.get():if event.type == pygame.QUIT:False if event.type == pygame.KEYDOWN:if event.key == pygame.K_LEFT or event.key == ord ('a' ):0 )if event.key == pygame.K_RIGHT or event.key == ord ('d' ):0 )if event.key == pygame.K_UP or event.key == ord ('w' ):print ('jump' )if event.type == pygame.KEYUP:if event.key == pygame.K_LEFT or event.key == ord ('a' ):0 )if event.key == pygame.K_RIGHT or event.key == ord ('d' ):0 )if event.key == ord ('q' ):False for e in enemy_list:
(LCTT 译注:到本文翻译完为止,该系列已经近一年没有继续更新了~)
via: https://opensource.com/article/18/7/put-platforms-python-game
作者:Seth Kenlon 选题:lujun9972 译者:robsean 校对:wxy
本文由 LCTT 原创编译,Linux中国 荣誉推出
